Hello again! So, the dummy is done, the character and location design is approved, we are ready to go to
 |
| opening view of part 3 of Yvain |
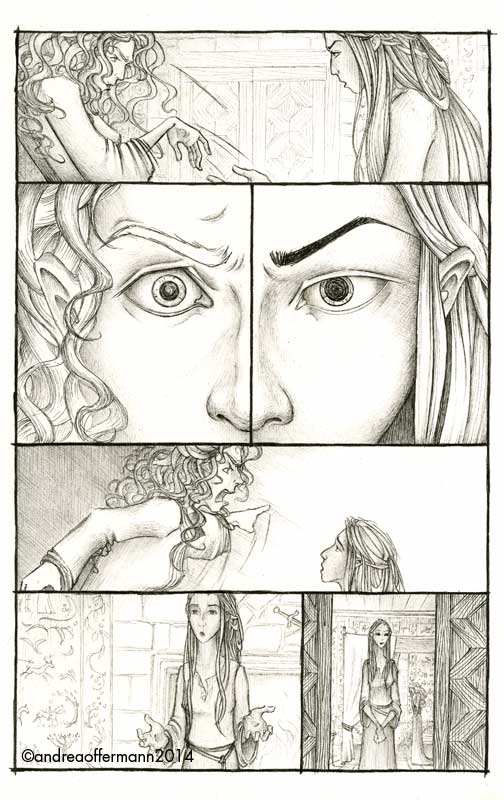
Part 3: Final Art for Yvain
Step 1: Testing drawing and painting styles
 |
| Getting my tools ready... |
Before diving into finished art, I wanted to
do a couple of tests to see how different styles and media would work for the story.
There were several things I had to keep in mind when doing these test pages:
1. Of course, the style had to fit the feel I
wanted create for the story. I wanted something that allowed for depth and
subtlety, but also some hard lines. The story has all the romantic notions of a
typical knight’s tale but underneath there is sharp irony and the rockhard
resolve of the characters. I wanted that to be reflected in the art.
2. The speech bubbles would not be
done by me but by the art director, in close communication with me. This is
unusual for graphic novels and it meant that I had to figure out a way of
putting the pages together that allowed me to still make adjustments when the
speech bubbles were put in place.
3. Lastly, I needed to keep a close
eye on the amount of time I had to plan for each page and find a middle ground
between creating beautiful art and staying within my schedule.
I started out by trying different media for the
line work. I have always admired the beautiful brush work that artists like
Craig Thompson use for their graphic novels. Even though I knew it would take
lots and lots of practice to get a beautiful line using brushes, I wanted to
try it out to see if it might work for the story:
 |
| Trying ink brush... |
As much as I love this style, I immediately felt that this was not right for what I had in mind. This kind of line tends to create a flat look and
the line itself conveys the atmosphere and the emotion. Also, it creates a
beautiful flow, and this did not feel right for the story either. I was looking
for
line work that allowed for more
detail and depth to build up the atmosphere more slowly. Also, rather than
flow, I wanted the line work to be very steady, to almost give the impression
that it was edged in stone.
So next, I tried pencil. Working in pencil
there are lots of possibilities for subtlety and gradation and I could easily
vary between hard and soft lines. I liked how the test page turned out,
especially the dimension I was able to give the characters through shading:
 |
| …pencil... |
The third medium I tried out was fine liner. I
tend to use either pencil or fine liner in my work so I feel very comfortable
with both. I liked the outcome with this medium as well, it had a harder
quality to it, almost chiseled, which I liked very much for what I was hoping to
convey in my art. This medium is not as forgiving though as pencil, if I made a
mistake it would be much more difficult to rectify than with pencil:
 |
| … and fine liner for final line work. |
I decided to go to color in both the pencil
and the fine liner art and see how it would work. These days I usually work
with watercolor when I go to color in my art. For the pencil art work I could
not use watercolor because it does not stick on pencil, so I worked with
glazing, which I love to use for my fine art:
 |
| Work in progress on color glazes for the pencil version... |
This gave me a beautiful luminous
effect and vibrant colors. It was extremely time consuming though because I had
to allow for drying time and build up the colors very slowly.
 |
| … and the final result. |
Next I worked with watercolor on my fine liner
version. This was nice to work with, I had great control over the colors and
compared to the glazing I could work quite a bit faster.
 |
| The final result for fine liner and watercolor. |
As a third option I tried digital coloring. This
would definitely be a practical choice because I would not have to scan the
artwork in again and it would be easier to make adjustments to the art. I liked
how it developed, but felt that it might be too clean or cold for what I wanted for the
story:
 |
| Digital color for the pencil version of the page. |
When comparing the finished test pages, I felt
that after all the pencil art was too soft and gave a misty impression. I did
not want that. This knight’s story was crisp and rough and
M.T. Anderson’s retelling
of it highlighted the ironic tone. I did not want to soften that, but
compliment it. On the other hand, the digital coloring I felt put too much of a
distance between the artwork and the reader. I wanted there to be a tactile
quality that pulled the reader into this world. So I decided to go with the
version using fine liner and watercolors, that transported the same crispness
and roughness I heard in Anderson’s tone but also offered a tangible quality
through the style of coloring.
 |
| The finalized test page that I sent to the publisher. |
Step 2: Working „in order“
After approval from the author and art
director I set out to paint the remaining 128 pages of the book. I put up the
concept sketches next to my desk to make sure that I had a clear idea of the
colors and the design at all times:
 |
| The color studies up on my studio wall. Depending on what scene I was painting I would pull down the corresponding color studies and put them right next to my work to have them in view at all times (that's why there are empty spaces where a page of the color studies is missing.) |
On the other side went a schedule of the work
I had to do:
 |
| My work schedule, well into working on Yvain |
When talking to other artists who had worked
on a project of this scale many had advised me not to work start to finish.
They said that this can show in the book in several different ways: either the style changes from start to finish as the artist becomes familiar with the
characters and the world he paints and so the beginning of the book might look
completely different from the end. This might happen too if the artist gets
rushed towards the end and is forced to adjust the style to make the deadline.
I wanted to avoid both scenarios so I decided to paint „scene by scene“ or
„location by location“ if you will. This way I was hoping to keep a consistency
in the art and present a book realized to the best of my potential in the end.
This meant that, for example, I painted all
the storm scenes together:
 |
| The storm on pages 14/15 and on pages 114-117 |
Or the scene of Yvain with the demon family:
 |
| Yvain meets the master of the sweat shop castle with his demon sons |
For some scenes I also had specific lighting planned, for example the scene of Lunette and Laudine sparring. I used a fireplace here as a single light source because I wanted there to be a strong contrast between the two figures. Laudine is illuminated by fire, while Lunette's face is hidden in shadow the entire time. This way I wanted to suggest the opposite colors of chess players or opposing teams. To make sure that I stayed consistent with the lighting and the colors I painted the pages of this scene all together:
 |
| The scene of Lunette and Laudine lit by the fireplace |
Step 3: Combining Art and Text
As I said before, this graphic novel project was
unusual in that the speech bubbles were done by the art director. To make sure that we would have as much freedom as possible to adjust the art and the placement of speech bubbles, I decided to
paint the pages containing dialogue frame by frame so we could move each of
them around:
 |
| Painting each frame separately to allow for adjustments later on when the speech bubbles are put in place... |
This proved very helpful when working on the
final layout with the wonderful art director for this project, Sherry Fatla.
She sent me the page with the suggested placement of the speech bubbles. I was
able to comment and make suggestions but also to move the art in each frame to
compliment her placement:
 |
| …the first version of the page with speech bubbles in place... |
 |
| …and the final version. Now the change of placement of the first speech bubble on the page clarifies the order in which the bubbles should read. Also, the art in the middle frame on the bottom has moved to allow more space for the speech bubbles without too much image information being lost. |
This was a time-consuming process that
involved a lot of discussion and weighing of options together with the art
director and the author. But it was definitely worth it and made for a much
more beautiful and successful book in the end:
 |
| On the left is the first version, on the right the final version of the page: By moving the first bubble to the right it now becomes clear that the lion reacts to Yvain's speech. Also, now the slave master's speech bubble is cutting into Yvain's bubble in frame 5. This visually underlines the fact that he is cutting off Yvain's speech. |
It was also a great experience getting to understand where each artist was
coming from, the designer, the author and the illustrator, and thinking outside
of ones’ own box.
The Finish Line
 |
| Pages and pages of final art... |
Finally, the artwork was done and sent to the
art director, and the placement of the speech bubbles discussed and finalized.
Now I got to sit back and see how Sherry put together the beautiful book
design. A huge thank you to her for putting so much love and care
into each detail of the book! Just an example: we were discussing the font to
use for the book and had found one, "Southern Belle“, that we all liked:
However, not every font is ideal to be placed in speech bubbles, and this font
proved tricky because of the long ascenders and descenders. Sherry actually
contacted the designer of the font to ask if she would allow us to make adjustments, and the designer was kind enough
to allow it:
 |
| In the lower, adjusted version the ascenders and descenders (for example the t and h, the y and g) are shortened slightly. This way the leading can be smaller, the text can be slightly larger in the speech bubble and the type can be placed more easily within the round shape of the bubble. |
Then, it was time for presents:
Present #1: The color proofs
arrived, and were absolutely beautiful! There were only small details to clean
up and everything was good to go to print:
 |
| the color proofs for interior art and cover art |
Present #2: In december I received a copy of the advance reading copy with
a disclaimer that because of the paper quality the colors would be very muted.
Still, it was so exciting to hold the first bound copy of the book in my hands
and leaf through it!
Present #3: The timing was just perfect: On Christmas Day I received the first bound copy of the finished book! I am so happy
with how it turned out:
 |
| The cover of the ARC (left) and the final book (right)... |
 |
| …and interior pages of ARC (left) and final book (right). |
 |
| The letter and certificate from the Junior Library Guild |
I am so happy and grateful!


0 Comments:
Post a Comment
<< Home